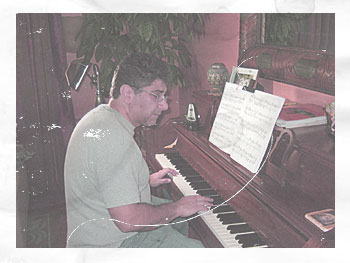
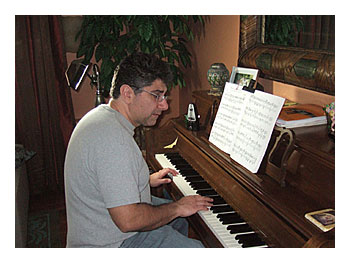
Example:
 |
 |
| Before | After |
What we do:
- We convert your photos onto a premium quality DVD or files.
- All DVDs come standard with a vinyl library case and cover printed a custom title of your choice.
- We clean the photo by airbrushing any dirt, loose particles or dust.
- All photo images are color corrected and cropped as requested before transfer.
- Using Digital ICE we remove or reduce minor scratches, creases, tears and blemishes from each print image.
- Full resolution is used for enlarging your photo. For example, a 4 x 6 print is enlarged to an 8 x 10.
- Picture sizes up to 8 x 10 can be transferred to a DVD.
- Standard conversion is great for DVD slide shows or printing them for same size prints.
- Each photo is converted into a .jpg file for use in a DVD slide show or a flash drive for TV viewing.
- A DVD will hold approximately 940 photos as .jpg files in a slide show format.
- Your photos can also be converted to a TIFF file that gives maximum flexibility. TIFF is preferred for printing, editing or archiving. TIFF flies are viewed through your computer DVD ROM drive. They are not used in a DVD slide show.
- A Data DVD holds approximately 900 photos as TIFF files scanned at 600dpi.
- The files can be put onto a flash drive ( jump drive ) or ext. hard drive.
- Photos can be grouped into folders that you name.
Prices:
Standard Resolution Transfer (600 DPI)
- Photos up to 5 x 7 in. $1.45
- Photos up to 8 x 10 in. $2.19
Full Resolution Transfer (1200 DPI)
- Photos up to 5 x 7 in. $1.89
- Photos up to 8 x 10 in. $3.49
Minimum charge for transferring photos to a DVD is $65.00
Options:
- Add light, easy listening music or music of your choice to the DVD for $20.00 for first hour and $10.00 for each additional hour. A nice addition when displaying silent images.
- Order extra copies of the DVD for family and friends for $10.00 each.
- Editing price depends on the extent of the editing. Call us with your request.
What you do:
- Using a soft pencil, lightly number each photo on the back, starting with #1. This will be the photo’s sequence on the DVD. Do NOT use a pen or a marker as the ink may rub off onto other photos
- Advise us about areas to be included or excluded (cropping).
- Call us to get the best price for your project.
- Advise us about options such as music, editing, custom cover, extra copies of the DVD for family and friends.
Notes on photo condition:
- Minor damage such as creases, scratches or blemishes can be reduced or eliminated, depending on the severity.
